-
Introduction
-
How to build
-
The GOGOBot Brain
-
Install the Arduino Software and Upload your first program
-
GoGoBot Drag and Drop Software
-
Basic Electronics
-
Getting Started with Programming
-
Libraries and Original GoGoBot Program
-
Making the GoGoBot Buzz
-
Potentiometers and Analog Pins
-
Combining things with "IF"
-
Push Buttons
-
Day Night Sensing
-
Infrared Remote Control
-
Advanced Programming
-
Ultrasonic Distance Sensor
-
Motor
-
Oled Screen and the I2C Protocol
-
Addressable LED's
-
Protocols
-
Bluetooth
Video Guide on How to Build the GOGOBOT
At this point I assume you cannot wait to build your robot, right? The video below will show you how to build it step by step. We uploaded the default program for you already and in a later lesson we will show you how to upload this program all by yourself,
The video below shows you, step by step, how to build the GoGoBot.
Step 1 Attach the motors.

Step 2 Attach the castor wheel

Step 3 Attach the ultrasonic sensor, wheels and connect the motor wire

Step 4 Attach the Arduino Uno

Step 5 Attach the Bluetooth module

Step 6 Attach the screen

Step 7 Connect the pillars

Step 8 Insert the battery (make sure it is the correct way around)

Step 9 Connect the two boards together via the pillars

Step 10 Connect the ribbon cable to both chassis

Charging the GoGoBot

The GoGoBot comes with a rechargeable lithium battery. When you are supplying the Arduino microcontroller with power, the battery will automatically charge The Arduino board, shown above, can receive power in two ways. You can connect it to a computer USB port. That usually is how we power the Arduino because we also upload code to the microcontroller through this connection.
You can also power the Arduino with a 12V power supply that has more power and will charge the battery faster.
The current from a USB cable is small, and the battery will take quite a long time to charge. Also, remember when a computer or laptop goes into sleep mode the USB ports also go into sleep mode, and no charging will happen. If you are planning to drive the robot around a lot, I suggest a 2A 12V power supply. If you have the GoGoBot plugged in while using your computer during the day, it will charge the battery and have it fully charged most of the time.
Bluetooth App
Let me start off by telling you that you do not need a mobile phone to do this course. It is fun to play around with the app but from the next lesson (that is also the first lesson) the app is not required at all.
In the resources section below is a downloadable version you can download and install. This version is not always the most up-to-date version but the one on the Google Play Store is. Also, your phone will complain that you are installing an app that they did not verify. To install it you can just ignore the warnings.
This link will take you directly to the play store to download the app on Android: GoGoBot Appstore link
This link will take you directly to the play store to download the app on iPhone: GoGoBot Appstore link
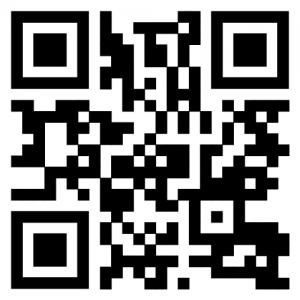
By far, the easiest is to scan the QR Code below that will take you to the Google play store. If you have a QR Code scanner on your mobile phone, you can use this code to download the mobile app directly to your phone.

There are no comments for now.
Share This Content
Search a product
Find a product
Our new website had a big makeover & requires a password reset.
Our new site is faster, has easier searches & navigation, more educational content and more support systems. Behind the scenes, seamless support, stock and shipping integration for speed and accuracy.
Passwords are encrypted and could not be transferred to this new platform. Please reset your password, it will take one minute to do.